Your first timeline
This page takes you from an empty application to a timeline that switches sources, with descriptions your operators can read and transitions where you want them. No mixer is involved yet — everything here works offline.
Create the project
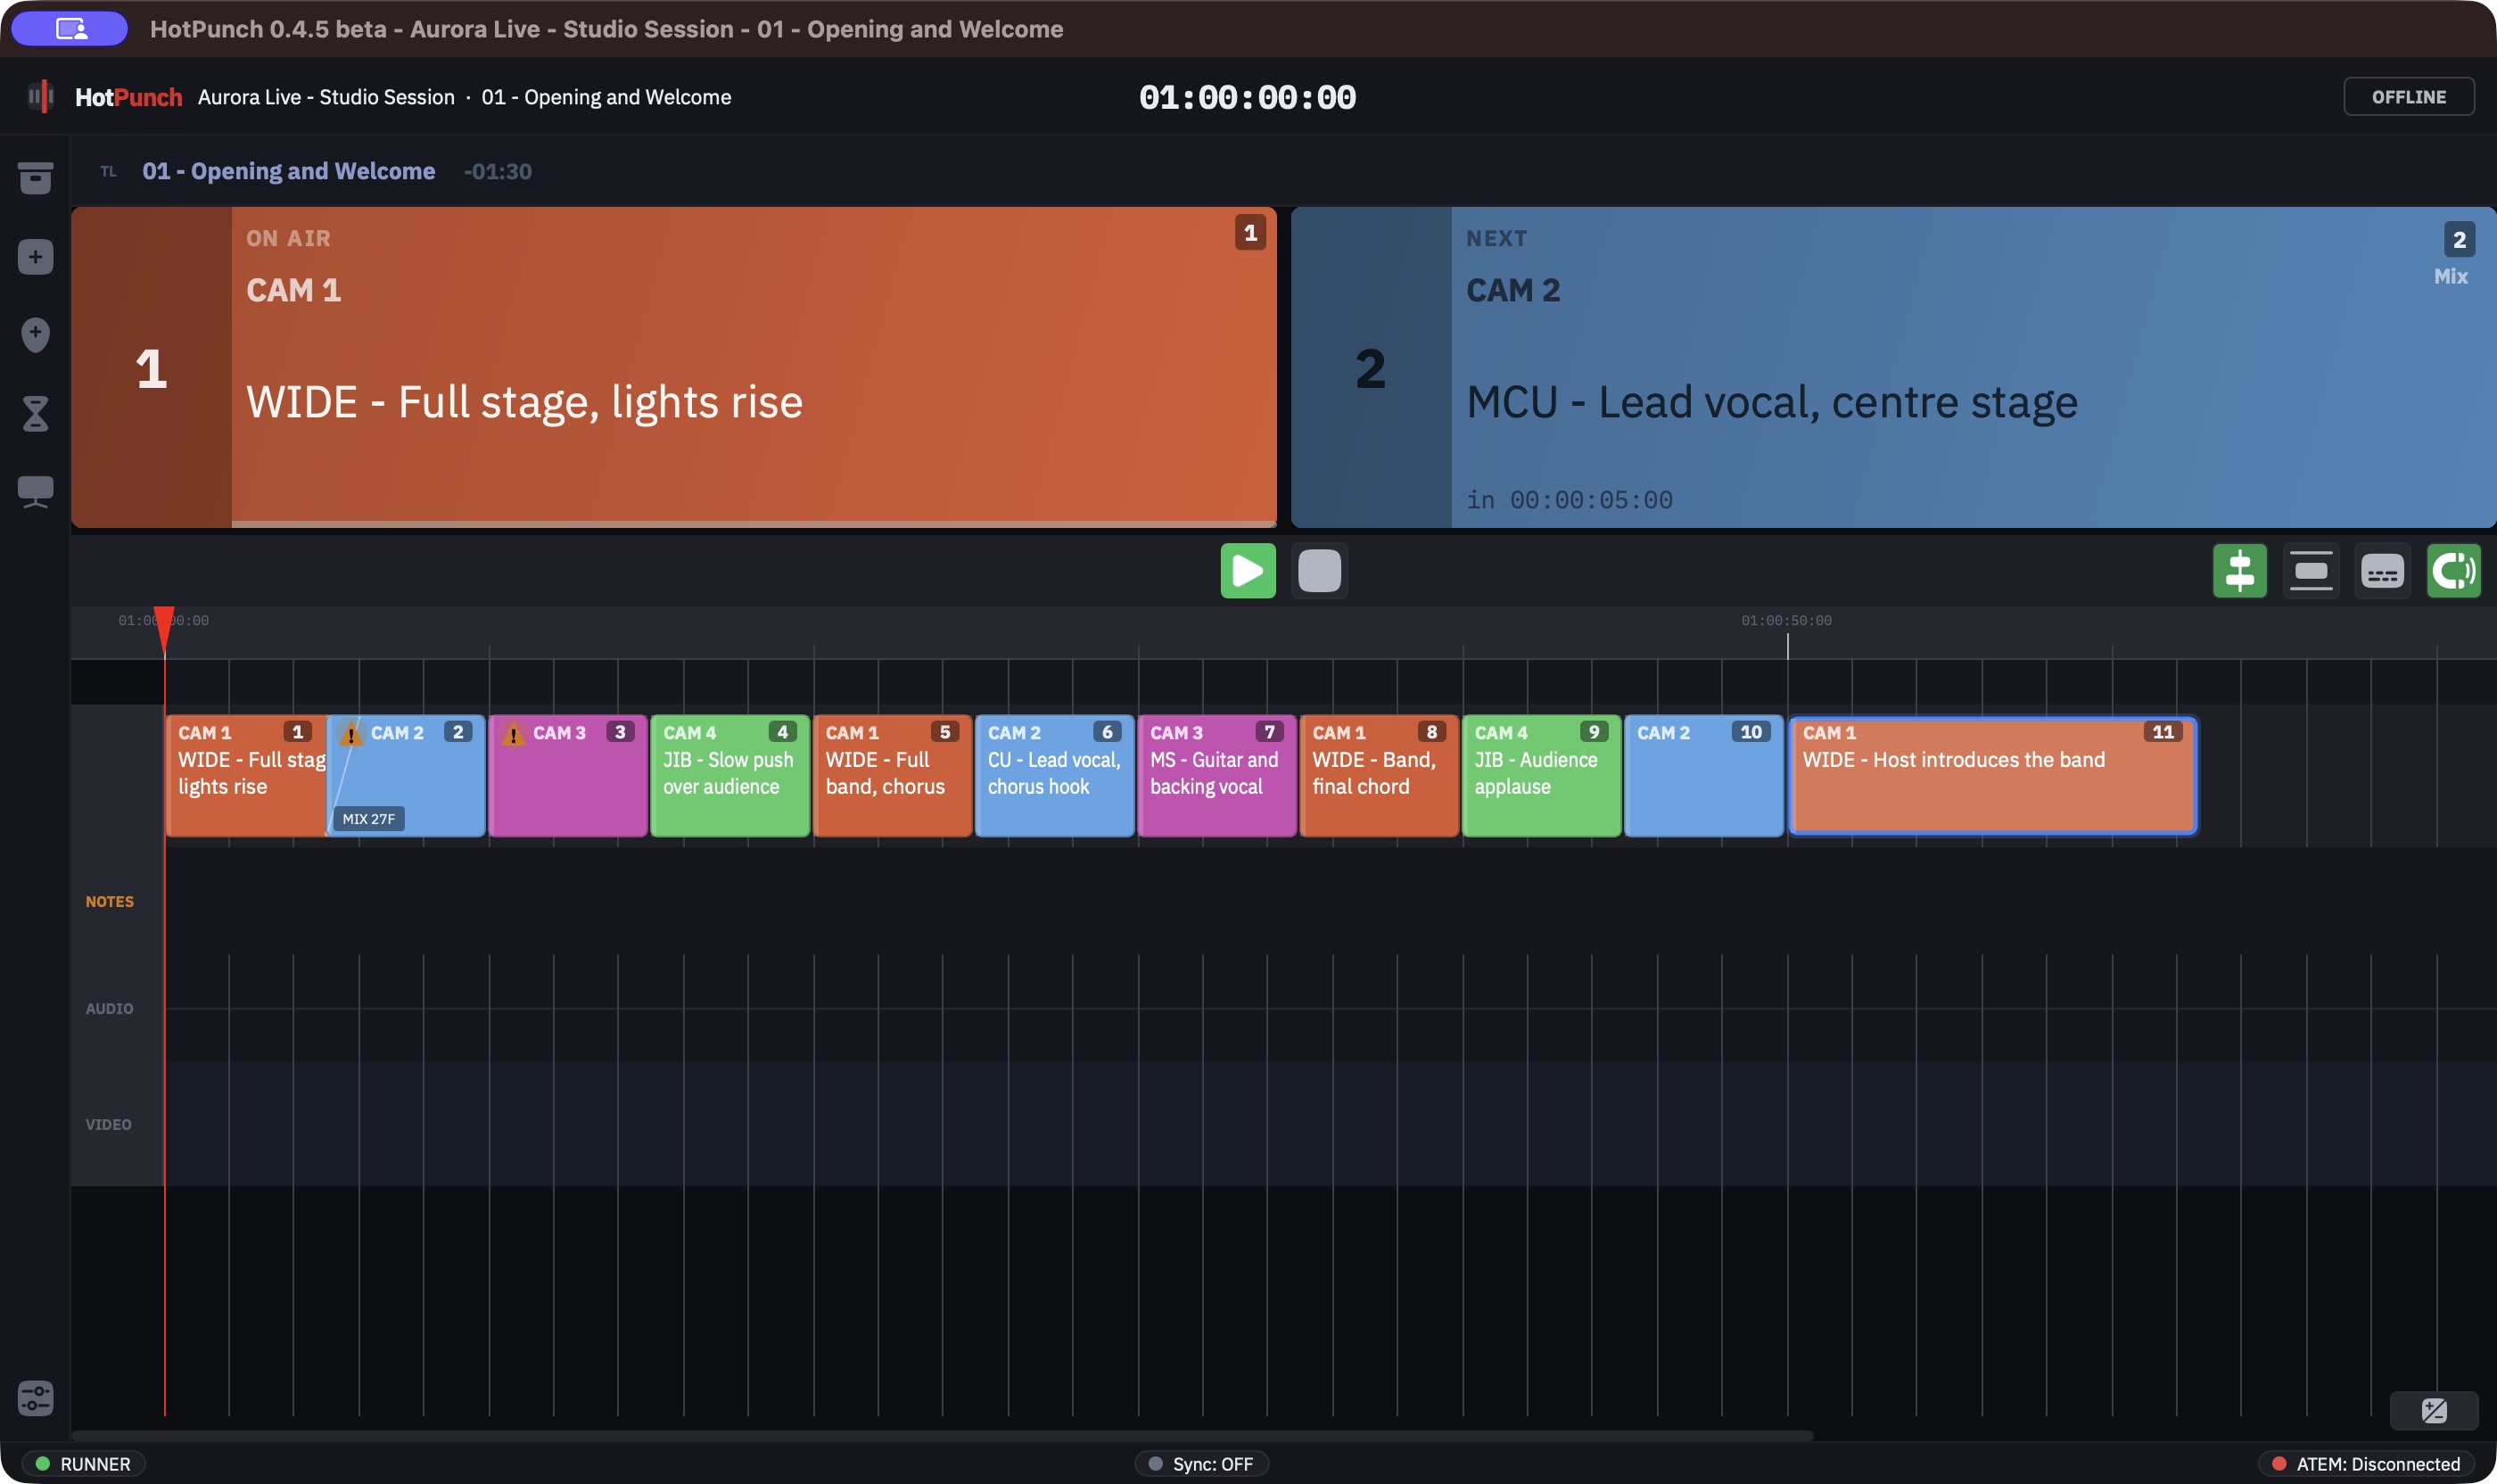
File > New Project opens the Project Information dialog first. Fill in at least the
project name; the rest (production, director, assistant director, notes) is optional, and
all but the notes later print on your cue sheets. Venue and date belong to the show, not
the project — they live in File > Show Info.... Then choose where to save the .punch.
HotPunch creates two things for you: a timeline called Timeline 1, and a show called Default Show containing it. You are already in a show — that matters, because going live later requires one.
Note
In Demo the file chooser is skipped and the project lives in memory only. You can build the whole thing, but closing the application loses it. See Licensing.
Set up the timeline
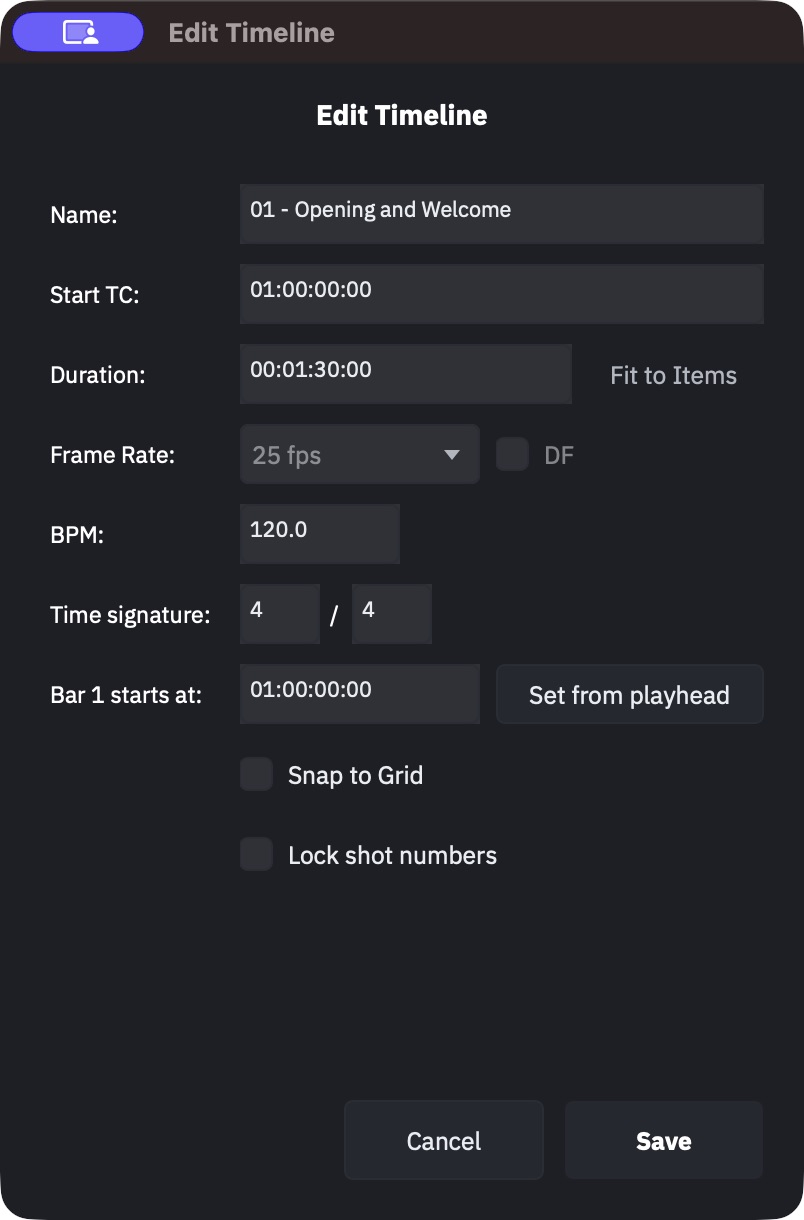
Open the timeline's settings — double-click it in the timeline sidebar, or Alt+Enter with
it active. Four of the fields decide how the rest of the show behaves.
Start TC
A new timeline starts at 01:00:00:00. This is not decoration. The start timecode is the
anchor that maps incoming timecode onto positions in your timeline: if the show's timecode
source starts the act at 10:15:00:00 and your timeline says 01:00:00:00, the playhead
will chase to somewhere that does not exist.
Set it to the timecode this stretch of show will actually receive. If you are not chasing external timecode, any value works — but a realistic one makes the cue sheet readable to people holding a stopwatch.
Duration
The duration is explicit — HotPunch does not grow the timeline to fit what you drop on it. Fit to Items sets it to the end of the last cue, track or marker. Duration matters for more than the ruler: two timelines in the same show may not overlap in timecode, and it is the duration that defines the range.
Frame rate, and who owns it
On a fresh project the frame-rate control in the timeline dialog is greyed out; hover it and the tooltip reads "Frame rate is controlled by Project Settings". That is not a bug — the timeline is the lowest of three levels that can decide the rate, and a higher one is switched on by default.
The control that works is in Settings > Project. When a mixer is connected and governing, even that one is read-only, and both dialogs show "Controlled by engine" next to the field. Who owns the rate, and how to take ownership back, is in Frame rate governance.
Drop-frame
At 29.97 and 59.94 you can tick DF, and the separator before the frames becomes a
semicolon — 01:00:00;02. At any other rate the toggle is disabled, because the concept does
not apply. On a fresh project this toggle is greyed out for the same reason the frame rate
is: the project owns it.
Pick the same designation as the source you will chase. Getting it wrong never fails loudly — it puts the show about 3.6 seconds per hour away from where everyone else thinks it is. What drop-frame is, why flipping it preserves your digits, and how the designation is decided are all in Drop-frame.
BPM and snapping
The dialog also carries BPM, a Time signature (numerator/denominator), a Bar 1 starts at field with a Set from playhead button, and a per-timeline Snap to Grid. Together they give you a musical grid to snap cues to — useful on a music show cut to the beat, irrelevant on a conference. Snapping to objects is separate and always available; see below.
BPM, time signature and the bar-1 position are per-timeline, because they describe the song, not a viewing preference. Bars only show up on the ruler when Show bars and beats is switched on in Settings > Project — that toggle is per-project, and it adds a second row to the ruler without ever touching the timecode row above it. Cue dialogs and exports stay in timecode regardless.
Load your reference media
Build against what you will hear and see: a guide track, a click, the playback the show runs on.
- File > Import > Audio... (
Alt+A) or Video... (Alt+V). - Or drag files straight onto the window. Audio and video are recognised by extension; anything else is ignored.
You can load several audio tracks — a guide track plus a comms reference is a common setup — and they all play in sync with the playhead. Each track has its own volume and mute, and a right-click chooses Stereo, Mono Left or Mono Right, which is how you deal with a file that carries programme on one leg and something else on the other.
Video tracks open a floating preview on double-click. Up to four previews can be open at once; each one is a live decoder, which is why there is a limit.
Aligning a track by its embedded LTC
If a file carries LTC on one of its channels, right-click the track and choose Scan for LTC.... HotPunch reads the timecode out of the file and offers two different repairs — they are not interchangeable:
- Move Track moves the file so it sits at the timecode it claims. Use it when the timeline is right and the file landed in the wrong place.
- Adapt Timeline TC moves the timeline's start to match the file. Use it when the file is the reference and the timeline was set up on a guess.
The audio right-click menu also offers Fit timeline to audio, which sets the duration to the end of the track. It is refused if the new duration would overlap another timeline in the same show.
Warning
This is a one-off alignment tool that reads timecode out of a file. It has nothing to do with chasing LTC in real time during the show — that is a different feature, set up in Timecode sync.
Note
Media is referenced, not copied into the .punch. Audio extracted from video files
lives in a cache on this machine only. Copying the project to another machine and
expecting sound will disappoint you: see Moving a project.
Place your first cues
Put the playhead where the shot starts, then pick a source: click it in the camera palette,
or press its number key (1-9 and 0 for camera 10, Alt+1-Alt+0 for 11-20; B and
W for black and white). Only cameras within the configured camera count respond. Each new
cue is a CUT lasting the default cue duration (5 seconds out of the box, in
Settings > Project). If the timeline is stopped, the playhead jumps to the end of the new
cue, so you can keep placing shots without touching the mouse.
Three behaviours are worth learning now, because they surprise people later:
- With a cue selected, picking a source does not insert anything — it changes that cue's source. Same for the number keys. It is the fastest way to fix a wrong camera, and the easiest way to wreck a cue you forgot was selected. Click empty timeline to deselect.
- Inserting inside an existing cue truncates it. The cue you land in is shortened to end at the playhead, and a toast says "Previous cue shortened to fit".
- Nesting is allowed, and it lies to you. A cue fully inside another produces a warning: PGM follows the inner cue while the display still shows the outer one.
Once cues exist, edit them by hand: drag to move, drag an edge to resize, Cmd+C/Cmd+X/
Cmd+V/Cmd+D to copy, cut, paste and duplicate, Backspace to delete. All of these work
on a whole multi-selection — Cmd+Click to add, Shift+Click for a range, or drag a
rubber band over empty space. One Cmd+Z undoes the entire batch, not one item at a time.
While you drag, positions snap to whatever is nearby: the playhead, markers, the edges of other cues, the edges of audio and video tracks — plus the beat grid if you turned it on. The Snap button in the transport bar (icon only; hover for the tooltip) turns snapping off when you need a position that isn't anybody's edge.
Dragging the playhead on the ruler is free by default — hold Shift to make it snap. While you hold it, the playhead obeys the same two rules as everything else: it snaps to objects when the Snap button is on, and to the beat grid when the timeline has Snap to Grid. Shift decides whether the playhead snaps, not what it snaps to.
What the operators read
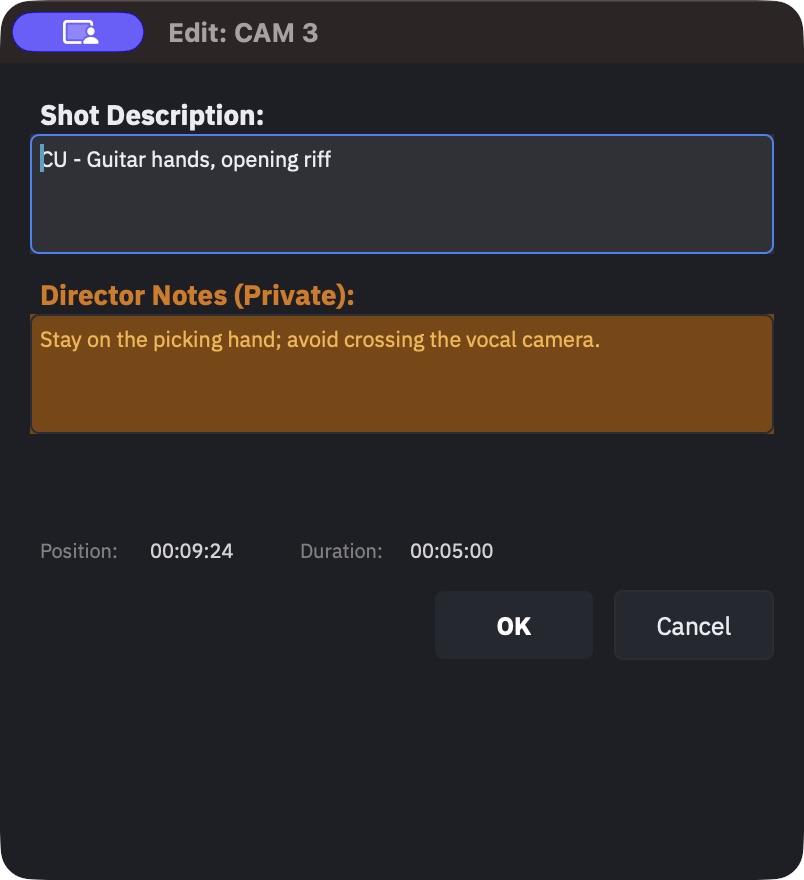
Double-click a cue to open its editor. Two text fields, and the difference between them is the whole point:
- Shot Description — what this shot is. "Wide", "close on vocalist", "stand by for VT". This travels: it reaches camera operators on their web view, and it prints on the cue sheet. Write it for someone who is looking at a camera, not at you.
- Director Notes (Private) — your own reminders. These are never sent to the operator views. They do appear in exports if you ask for them: the PDF has an explicit "Include Private Notes" option, and CSV export always writes the column. Private means private from the crew's screens, not from a file you hand somebody.
Both fields hold two lines; a third line is trimmed as you type. Enter makes a new
line, so confirm with Cmd+Enter; Escape cancels.
A cue that carries private notes shows a small warning icon on the clip, so you can see from the timeline that there is something you wrote and the crew cannot see.
Note
Going live closes this dialog. If an Apply arrives anyway, it is refused — see the editing boundary in the operational states.
Transitions: make an overlap
There is no "add transition" command. A transition is an overlap between two cues, and that is the only way to get one.
- Drag the right edge of a cue so it extends past the start of the next one — or drag the next cue back under it. Either gesture creates the overlap.
- The overlap is the transition, and its length is the transition duration. Two frames is the minimum; anything shorter counts as a CUT.
- HotPunch assigns MIX automatically. To choose something else, double-click the incoming cue: the Transition field appears only when an overlap exists, and offers Mix, Dip, Wipe, DVE, Sting and Clip.
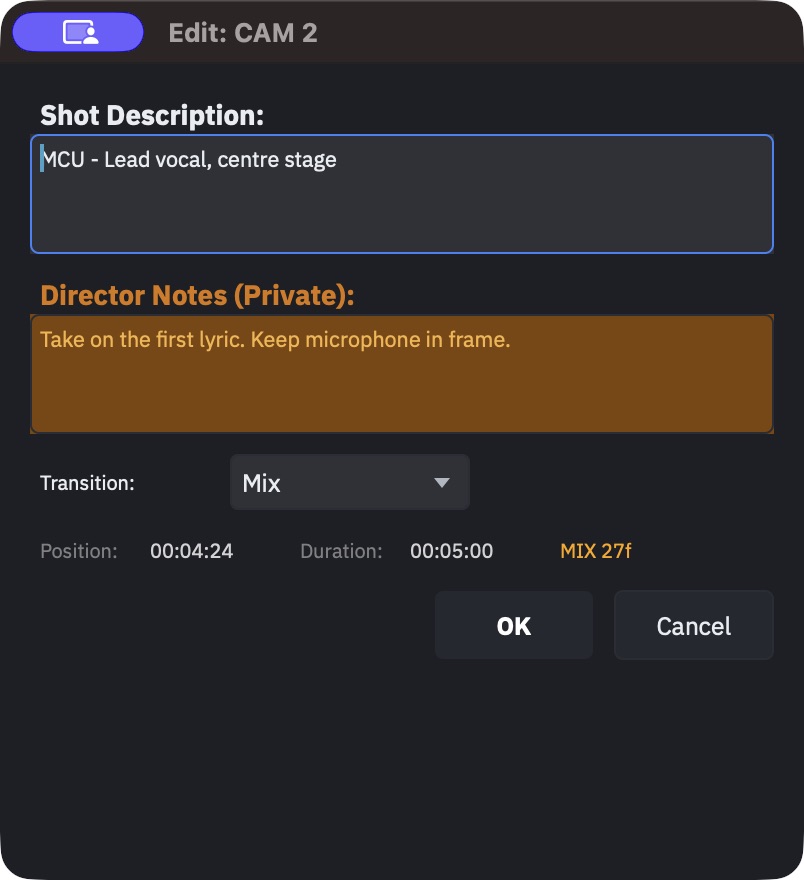
Pull the cues apart and the transition disappears — the type reverts to CUT by itself. The transition belongs to the incoming cue, which is why the first cue on a timeline is always a CUT: there is nothing to come from.
You can choose any of the six types with no mixer connected; HotPunch does not restrict your editing to what a switcher happens to support. When a mixer is connected and does not support your choice, the cue editor says so, showing the type it will actually be sent as. What each protocol supports is in Connect a mixer.
You have a timeline that switches. Next: the layers that make it a show — Building the show.